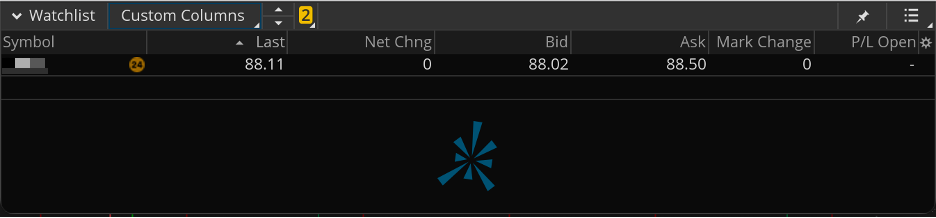
Columns like Mark, Mrk Chng, P/L Open, etc., appear in different areas of thinkorswim® and can be personalized and saved as custom column sets. Here’s an example of a column set from Watchlists:
Using custom columns, you can create different groups of columns (called sets) and save them so they are available across the trading platform.
Custom column sets are currently available in:
Using Custom Columns
- In the header above a column set, use the up and down arrows to cycle through available sets.
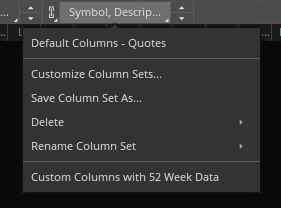
- To open the menu, click the name of the current column set.
- Click another column set name in the menu to switch the display. Default column sets appear at the top (in this case, Default Columns – Quotes) and custom column sets appear at the bottom (in this case, Custom Columns with 52 Week Data).
- In the same menu, you can also:
- Click Customize Column Sets… to open the column set window and edit or create column sets.
- Click Save Column Set As… to create a new set from your current columns.
- Hover over Delete and click the name of a custom column set to permanently remove that set. In the confirmation dialog, choose Delete Column Set or Keep column set and close. Deleting reverts the current area to the default columns.
- Hover over Rename Column Set and click the name of a custom column set to rename it. Type a new name and press Enter to save.
Custom column sets can also be created by clicking the settings icon " under the section header at the top. Then click Customize… to open the column set window.

Creating Custom Columns
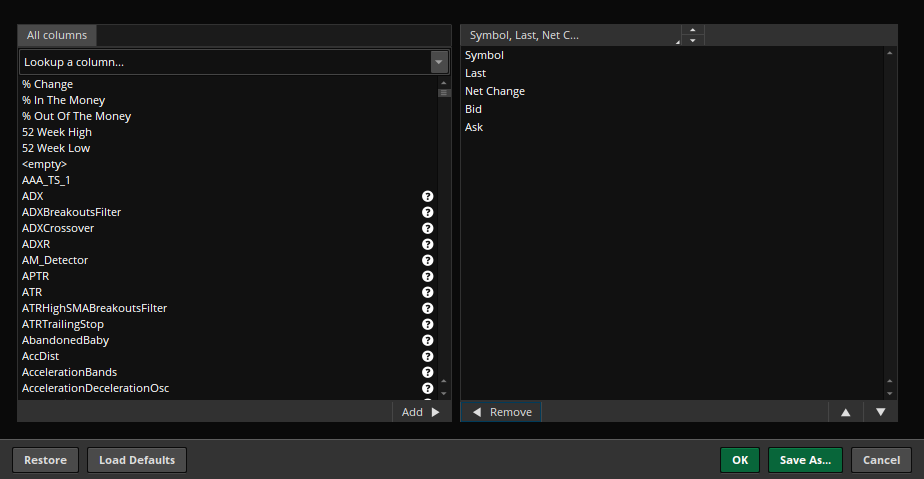
The column set window shows the displayed columns on the right and the available columns on the left. The columns on the right make up the current column set.
At the top of this window, use the up and down arrows to cycle through your saved column sets, or click the name of the current column set to open the dropdown menu and select one directly.
Editing the list of columns:
-
To add a column, select it on the left side and click AddŻ, or double-click the column name.
-
To remove a column select it on the right side and click źRemove, or double-click the column name.
-
To change the order of the columns, select one on the right side and click the up or down arrows on the bottom right.
-
Columns that are not available in the current tab or gadget appear greyed out. If you try to remove one, a confirmation dialog appears. Click Delete to remove it or Cancel to keep it. You can select Don't prompt again to skip this message in the future.
Managing the current layout:
-
To return to the last saved version of the set, click Restore.
-
To reset the layout to platform defaults, click Load Defaults.
Saving or applying changes:
-
To apply changes without saving them as a reusable set, click OK.
- To create a new column set, click Save As… and type a name for the new set. By default, column set names include all columns in the set. You can delete this text and enter a custom name like “Custom Columns with 52 Week Data”.